How to Host a Photography Walk
Plan a photography walk with a tested route, device-neutral prompts, protected regroup points, clear photo permissions, weather rules, and a 120-minute run of show.
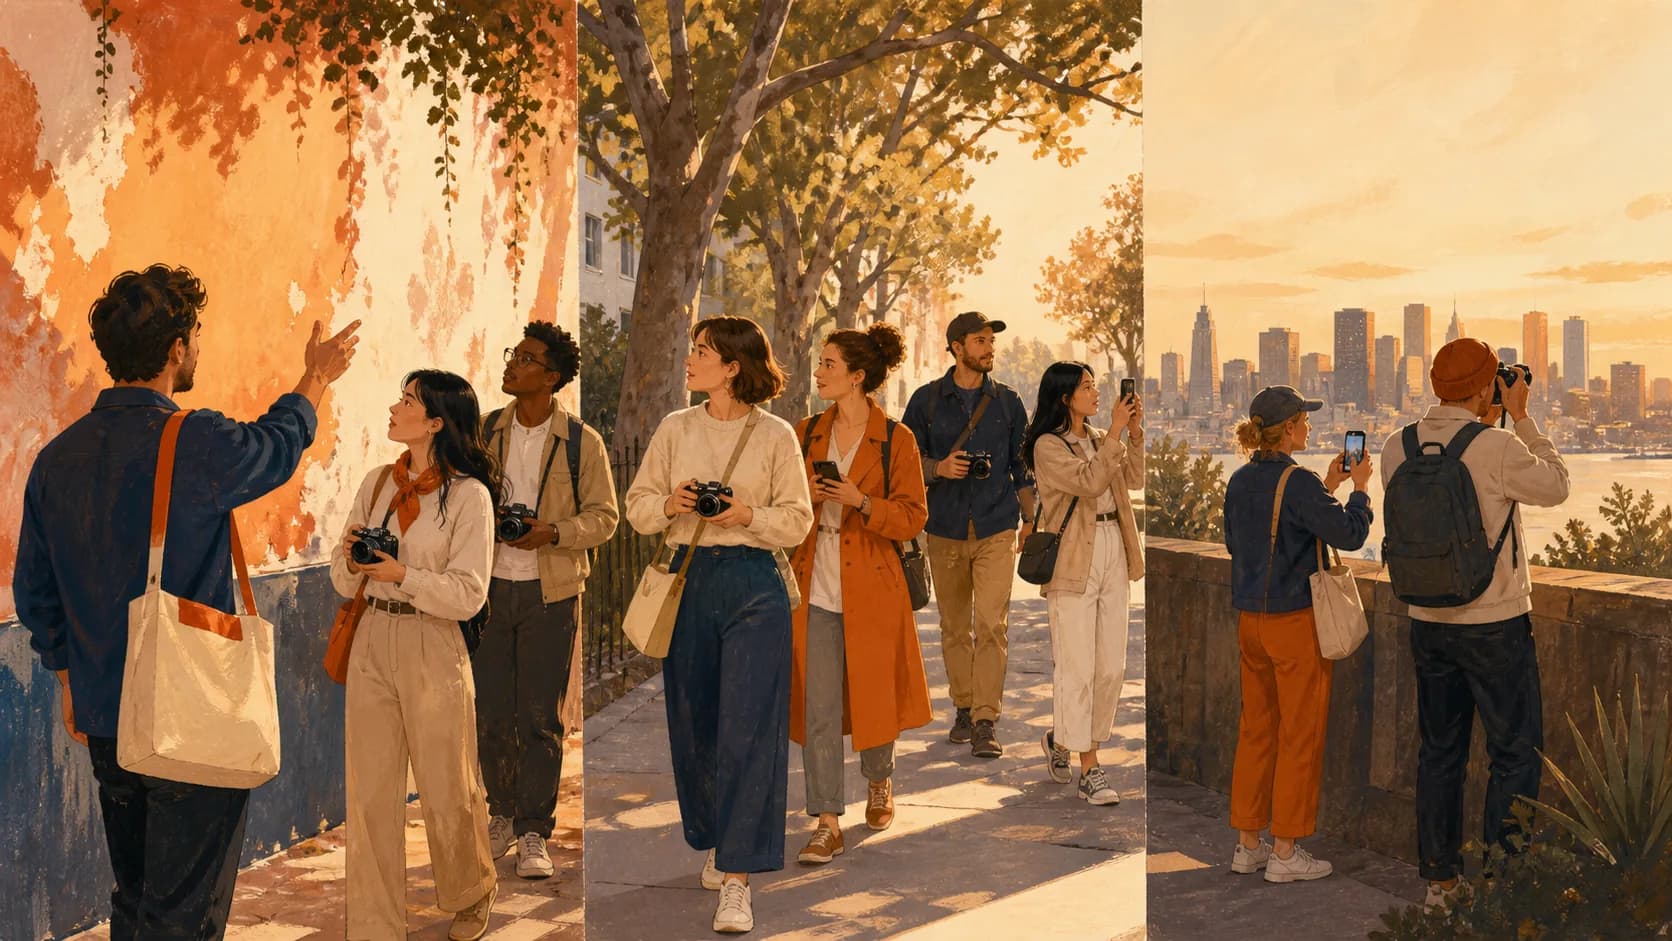
A good photography walk is a sequence of planned photo stops connected by a tested route. It is not an ordinary walk with camera advice added along the way. Route distance alone is a poor planning unit because every stop expands while people observe, compose, ask questions, and regroup. Build around those pauses, give phone and camera users the same visual problem, and decide before arrival what changes when time, weather, access, or permission no longer matches the plan.
For a first walk, choose a clear start and finish, test the route at the advertised time, prepare three prompts, publish the real access conditions, and mark one photo stop as optional. The host owns the route, timing, communication, consent process, and day-of decisions. Each guest owns their equipment, creative choices, and the images they make.
Lock These Decisions Before You Publish
- Plan time in photo stops and regroup transfers, not only distance or step count.
- Write prompts around observation and composition so a phone user and a camera user can act on the same instruction.
- Publish distance, surface, pace, stops, facilities, and the weather fallback before asking for an RSVP.
- Treat permission to make a portrait, permission to share it, and permission for the host to reuse it as separate decisions.
- Protect the briefing, regroup points, and close; remove an optional stop first when the walk starts late.
Build the Walk Around Shooting Windows, Not Distance
A shooting window is a planned stop where people can observe, compose, and make photographs. A regroup point is a named place where the group pauses and confirms everyone is present before moving. Shooting windows and regroup points turn a scenic path into an event route. One mile or kilometer can work when it contains three distinct visual problems and easy transfers; a shorter route can fail when crossings, crowds, or unclear meeting points consume the time. General event-risk guidance from WorkSafe New Zealand asks organizers to identify site and weather risks before the event. Inspect the actual path rather than treating a map line as proof.
Choose a start that is easy to describe without a host holding a sign. Give the exact landmark, street side, and arrival window. Choose an end where guests can stop without blocking a path and where the host can close the event. Between them, identify two main shooting windows and one optional window. Each should have a distinct visual reason to exist: repeated lines, reflected light, portrait backgrounds, movement, color contrast, or a change in viewpoint. If two stops offer the same problem, keep the easier one.
On HereNow, the verified route description, level promise, and required equipment can become a page that helps guests choose. Follow the principles for how to write an event page that gets informed signups without turning uncertain details into promises.
Test the Route at the Event Time
Walk the full route on the same weekday and at roughly the same time as the event. Start a timer at the published meeting point. At each planned window, stop for the full amount of shooting time instead of walking straight through. Check light direction, shade, noise, traffic cycles, construction, crowd flow, public toilets, places to rest, mobile signal, and the visibility of every regroup point. Note where a guest could take a shorter route to the finish and where the group could shelter without crossing a hazardous area.
Run the test with the equipment the host will carry. A route that feels easy without a bag may change when the host also manages water, first-aid supplies, and an attendance list. Save a route sheet with the start, end, stops, transfer directions, fallback, and two contact numbers. Keep it separate from the public guest list.
Check the Rules for Every Stop
Public access does not create one universal permission rule for an organized photo walk. Check the owner or authority for every park, station, market, museum exterior, private courtyard, or managed public space on the route. Group size, commercial purpose, lighting, tripods, props, obstruction, exclusive use, and impact on other visitors can change the answer. The U.S. National Park Service's Federal Hall permit guidance, for example, distinguishes some small hand-carried photography activity from larger groups or business workshops that may need authorization. That is a location-specific example, not a global rule.
Record who answered, what activity you described, the date, and any conditions. If permission is unclear, change the stop before promotion. A good fallback uses a place already checked under the same rules; it is not an improvised detour into another managed location.
Write Prompts That Work for Phones and Cameras
A mixed-device walk works when the main prompt describes a visual decision rather than a camera setting. “Find three layers and decide which one carries the subject” is useful on a phone, compact camera, or mirrorless body. “Set the aperture to f/2.8” excludes devices without that control and turns the host into a moving technical help desk. Put settings in an optional extension after the shared prompt: a camera user might test depth of field, while a phone user might change distance, angle, or exposure compensation.
State the level honestly. “All devices welcome” should mean the host will not require a specific lens, manual mode, or editing app. It does not mean every device can make the same result. Ask guests to arrive with a charged device, enough storage, weather protection appropriate to the forecast, and only the accessories they can carry without blocking paths. Avoid a gear list that quietly changes a low-barrier walk into a shopping requirement.
Use a Notice, Compose, Move Prompt Ladder
Give the group a three-part prompt at each stop: notice, compose, then move. Notice: name one thing to observe, such as repeated shapes, warm light, or a foreground frame. Compose: ask for one decision, such as isolating a subject or simplifying the background. Move: invite a physical change—take three steps, lower the viewpoint, or wait for a clean moment. The ladder moves from seeing to framing to experimentation without requiring identical controls.
Prepare one easier entry and one optional extension. At a portrait stop, the entry might be “place the subject near open shade and simplify the background.” The extension might be “make a second frame that changes the subject-to-background distance.” Demonstrate for no more than two minutes, then let people shoot. If half the group is still listening while the other half has moved, the instruction was too long or the boundary was unclear.
Run a 120-Minute Route With Protected Transitions
A photo walk is protected shooting windows connected by tested transfers. Each stop expands for observation, composition, questions, and regrouping, so walking time alone cannot predict the event duration. Under the illustrative plan below, the host protects a 15-minute briefing, two 10-minute transfers, a 15-minute return, and a 15-minute close. The three shooting windows use 55 minutes, and the third is explicitly optional. That distinction gives the host a real decision when 15 minutes disappear.
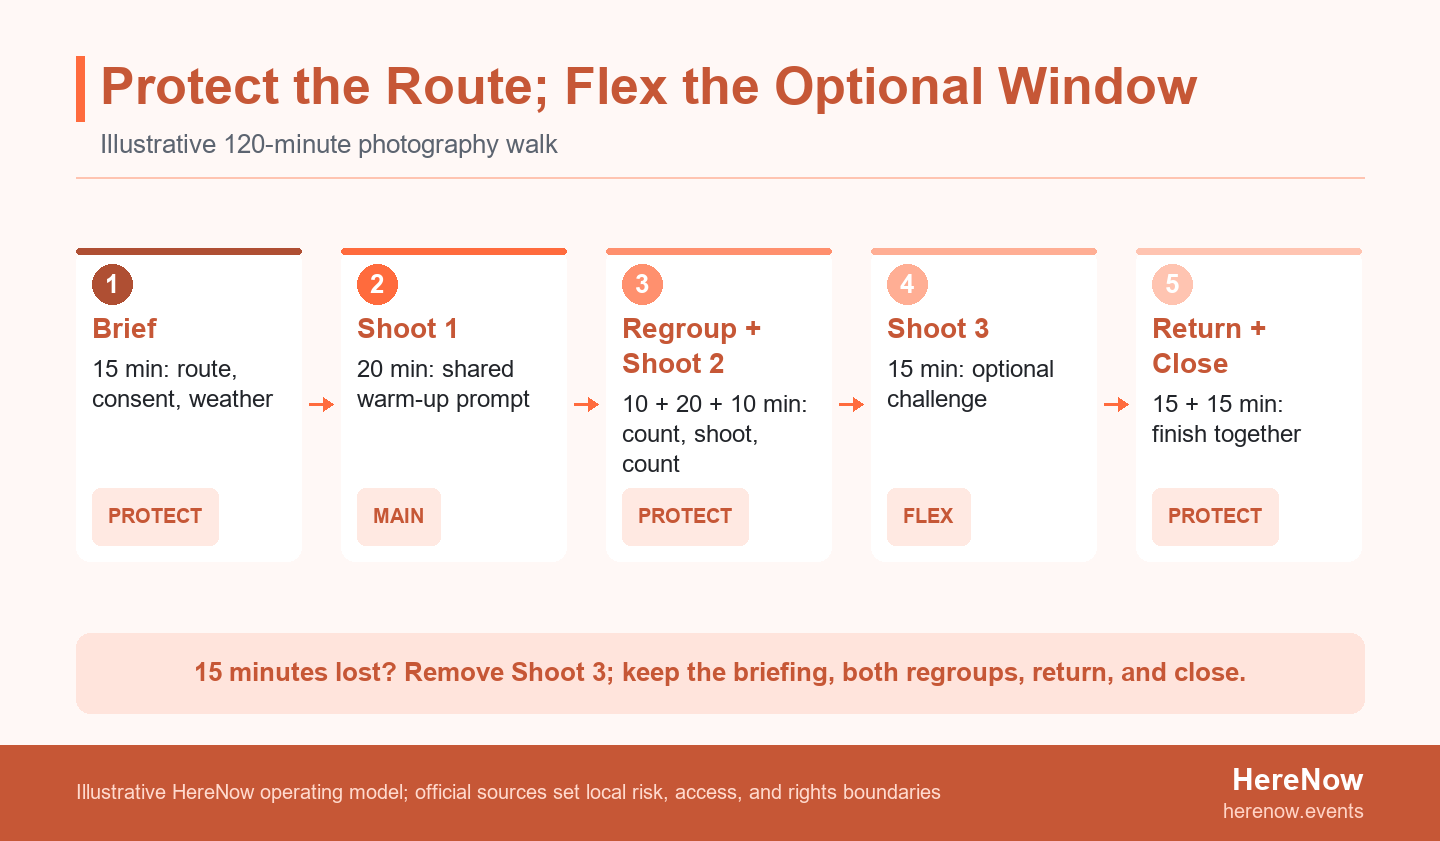
| Event time | Route block | Host responsibility | Delay status |
|---|---|---|---|
| 0–15 minutes | Welcome and briefing | Route, consent, weather, buddy and regroup rules | Protect |
| 15–35 minutes | Shooting window 1 | Warm-up prompt and individual check-ins | Keep |
| 35–45 minutes | Transfer and regroup 1 | Count the group at the named point | Protect |
| 45–65 minutes | Shooting window 2 | Main prompt and optional technical extension | Keep |
| 65–75 minutes | Transfer and regroup 2 | Confirm the group before moving | Protect |
| 75–90 minutes | Shooting window 3 | Optional challenge at a pre-checked stop | Remove first |
| 90–105 minutes | Return to finish | Keep pace and use the shorter checked path if needed | Protect |
| 105–120 minutes | Close and next step | Regroup, optional share, departure information | Protect |
The blocks total 120 minutes: 15 + 20 + 10 + 20 + 10 + 15 + 15 + 15. Treat that arithmetic as a planning model, not a standard every host must copy. A nature trail, night walk, mobility-led route, or architectural workshop may need different stops and a different total. Once the route timing is real, adapt the Golden-Hour Portrait Walk template; its default capacity and agenda are editable starting points, not permission or proof that the route can support them.
Drop an Optional Shooting Window Before You Rush the Group
Mark the optional stop on the host run sheet before the event. If arrivals or transit consume 15 minutes and the finish time cannot move, remove that stop. Do not reclaim the time by shortening the route briefing, sending fast walkers ahead, skipping group counts, or turning the close into instructions shouted while people leave. Under these assumptions, two main shooting windows remain, both transfers remain intact, and the event still ends at 120 minutes.
A shorter delay can be absorbed inside a shooting window only if the group still has time to act on the prompt. A route, permission, weather, or access failure is different: removing one stop may not solve it. A route fallback is an option approved in advance for changed conditions or timing. If it has not been checked, pause or cancel instead of inventing it live.
Set the Weather and Emergency Decision Before Arrival
Write a weather decision that names the condition, decision time, owner, message, and alternative. “Rain or shine” is not a plan. Check the forecast during route testing, again the day before, and at a fixed time before guests travel. Define which conditions cause the walk to continue, use a shorter checked route, move to a confirmed indoor format, postpone, or cancel. Consider heat, cold, wind, poor air quality, ice, flooding, visibility, slippery surfaces, and any condition that affects safe travel or emergency access.
Tell guests where the message will appear and whether postponement or refund rules apply. If the group separates, name who stays with the main group, who contacts the missing guest, and where everyone waits. Keep a second copy of the route and attendance list.
Name the Monitoring Owner and Decision Time
Lightning requires a specific stop-and-shelter response, not a promise to watch the sky. The U.S. National Weather Service's guidance for outdoor activities calls for a lightning plan with monitoring, suspension, safer shelter, and resumption decisions. Use the official guidance for the event location, name the person monitoring it, and tell guests where to go. Do not assume a covered picnic roof, tree, or open structure is safe shelter.
Make the call early enough to be useful. A cancellation sent after guests enter the route transfers uncertainty to them. If the host cannot monitor conditions while facilitating, assign another adult or use a format that can be stopped cleanly.
Separate Portrait Permission From Image Reuse
Joining a photography walk should not be treated as blanket permission to photograph every participant or publish their likeness. Set a simple portrait rule in the invitation and repeat it during the briefing: ask before making a recognizable portrait, accept “no” without debate, and do not pressure someone to model. If the host records a preference, make it specific and easy to change. The UK Information Commissioner's Office explains that, where consent is used, it should be freely given, specific, informed, and unambiguous in its consent guidance. That source also makes clear that consent is not automatically the correct legal basis in every situation, so hosts must verify the rules that apply to them.
Keep three decisions separate. First, may one participant make a portrait of another? Second, may the subject allow that image to be shared in the private group or a public channel? Third, may the host use the image or the person's likeness to promote HereNow, the host, or a future event? A yes to one does not automatically answer the others. Explain the destination, purpose, expected audience, and withdrawal route before requesting host reuse.
HereNow can hold the event details and RSVP path, but it does not turn attendance into image permission. The host remains responsible for the invitation, the live briefing, and any upload or reuse process. Photographers developing repeatable community formats can see how HereNow supports independent hosts once those operating boundaries are clear.
Keep the Photographer's Permission With the File
A guest who sends the host a photograph has not necessarily transferred the right to repost, crop, advertise with, or sublicense it. UK Intellectual Property Office guidance notes that the creator is generally the first copyright owner and that additional use can require permission under the relevant licence or agreement. Its digital-image copyright notice is jurisdiction-specific, but it illustrates the operational point: attach the agreed use to the file.
Record the photographer, recognizable subjects, approved channels, credit, edit permission, and any end date. If those facts are missing, request them or do not use the image. A shared album does not itself grant a marketing licence.
Use a Separate Safeguarding Plan When Minors Attend
If children or young people may attend or be deliberately photographed, use a written safeguarding and photography process suited to the jurisdiction and organization. The NSPCC's guidance on photographing and filming children recommends explaining purpose, use, storage, sharing, retention, and withdrawal, while respecting non-consent without excluding a child from the activity. It also distinguishes organizational photography from personal photography by families or spectators.
Decide the age policy before publishing. If minors are in scope, confirm guardian responsibility, supervision, identification of non-consent, device rules, storage, reporting, and local safeguarding requirements. If the host cannot operate that process, enforce an adult-only attendance rule.
Publish the Route Facts Guests Need Before RSVP
Guests need route facts before they decide whether the event works for them. Publish the approximate distance, event duration, expected pace, surfaces, steps, curbs, slopes, crossings, standing periods, rest points, toilets, lighting, start and end locations, transit or parking notes, and whether a shorter checked route is available. The W3C event accessibility checklist advises organizers to provide venue and route information and invite participants to communicate access requirements. Put those facts in text, not only inside a map image.
The U.S. 2010 ADA Standards show why “accessible” is too broad as a self-awarded label: entrances, public ways, transit, parking, and circulation paths are distinct route considerations. Use applicable local standards and an access review for compliance. On the event page, publish the verified features and barriers, provide a contact route, and avoid promising that one path fits everyone.
Ask Only Questions That Change Delivery
For a simple walk, collect a name and event-contact email, then add only an answer the host will use. Useful optional fields can include device type for prompt preparation, a practical route or access request, or a day-of phone number when last-minute outdoor updates genuinely require it. Do not collect medical histories, broad personal profiles, or an emergency contact merely because outdoor-event forms often contain one. For every extra field, name who sees it, why it is needed, and what action follows.
A photo preference field can help the host prepare, but it is not a universal legal release and should not replace asking before a portrait. After the field list is settled, use HereNow to collect RSVPs without attendee accounts and keep the registration path proportionate to a small creative event.
Illustrative Day-of Example: A Golden-Hour Walk Loses 15 Minutes
This illustrative example is not a reported HereNow customer result. An independent photographer plans a 120-minute city walk for 12 guests using phones and cameras. The route has two main shooting windows, one optional window, two regroup points, a checked return, and a fixed finish.
Protect the Briefing, Regroups, and Close
This is an illustrative example, not a reported customer result. The host prepared a 12-seat, 120-minute event, tested the route, checked the managed stops, published the surfaces and distance, and prepared three device-neutral prompts. Ten people RSVP.
A transit delay costs 15 minutes before the briefing. Golden-hour light and the route end time remain fixed. The weather remains inside the pre-agreed plan, and every route stop is usable. The lost time is a schedule problem, not a reason to skip consent or regrouping.
Rushing the two transfers could split the group, while compressing the briefing would hide the portrait and weather rules. The host removes the optional 15-minute third window. The group keeps both 20-minute main windows, both 10-minute transfers, the 15-minute return, and the 15-minute close. The route ends on time without sending faster guests ahead.
Before the next event, the host moves the arrival deadline higher on the page and keeps the third stop visibly optional. Ask whether guests could find each regroup point and had enough uninterrupted shooting time, then send a focused post-walk follow-up. This illustrative example does not establish a universal route length, capacity, or legal rule.
Publish a Walk That Matches the Route
Open registration only when eight release answers are yes: Is the start unmistakable? Has the route been tested at the event time? Are every managed stop and fallback checked? Do the prompts work without one required device? Are briefing, transfers, return, and close protected? Are weather and emergency owners named? Are portrait, sharing, and reuse rules separate? Are the route's access facts visible? Hold the page if any answer is no.
When the route matches the invitation, start creating your photography walk. Invite a first group with practical ways to promote a small event without paid ads, then use observed timing and regroup questions to decide whether to turn one photo walk into a series.
Frequently Asked Questions
How long should a first photography walk be?
A 90- to 120-minute route is a workable first planning range, provided it includes real shooting and regrouping time. The correct duration depends on the route, visual stops, pace, light, access needs, weather plan, and host attention. Test the full event at the advertised time instead of estimating from map walking time. If the first route needs more than three prompts or several difficult transfers, shorten the route before adding more minutes.
How many people should join a photo walk?
Set capacity from the route, host attention, regrouping method, and venue rules rather than copying a generic number. A host must be able to brief the group, notice a missing person, answer questions, and keep every transfer together. Wider open routes may support more guests than crowded crossings or narrow paths. If one person cannot monitor the planned group, reduce capacity or add a clearly briefed co-host or sweep.
Can a photography walk include both phones and cameras?
Yes, a photography walk can include phones and cameras when every main prompt focuses on a visual choice instead of a required setting. Offer camera settings as optional extensions. State that all devices are welcome only when no particular lens, manual control, or editing app is required. Ask guests to arrive with a charged device and enough storage. The goal is not identical files; it is giving everyone the same visual problem and enough time to solve it.
Do I need permission to take photos in public?
Public-space photography rules vary by location, group size, equipment, activity, and intended use, so check each route owner and local authority. An organized or paid workshop may face different rules from one person's casual photography. Private property, managed parks, transit areas, markets, protected sites, lighting, tripods, obstruction, and exclusive use can also change the answer. Separately, ask before recognizable portraits and get the permissions needed before reusing participant images.